Tuesday, March 5, 2013

The Printmaking Begins! Experiment #1

Here we go, I had a very productive day last week and am pretty pleased with my first trial.  I definitely learned a few things, and as students of mine know from classes I teach, have given myself a healthy bit of self-critique.  To coin Martha, "It's a good thing" (critiques, that is!)

As my inspiration was wood block printing, which I am still planning on doing, I thought it very efficient to try the block carving and printing using a much easier type of block to start.(mostly at the moment my spare time is so limited I am purely thinking of efficiency)  So I used rubber blocks.  They are super fast to cut and I can do the preliminary technique trials on them and then get into the wood idea - that pulled me into this new (but not foreign for me) medium - as I feel more confident.  In all color theory classes I teach I always encourage students to get to know the color range of your medium; watercolors, dyes, fiber, oils, pencils, whatever the medium, do some sort of color trials.  This is to know where your tubes or tubs of pigments will take you.  (I look for restrictions too, can I get my favorite brights?  Is color clean? and if not I try to find a different brand or do some more blending)


So things I tried and learned.  First was don't forget to flip your tracing (to reverse it)  While this scene looks basic, for many folks it really is an actual scene on Monhegan Island.  oops!  But for my first trial no big deal. Second, I tried brushing the color, watery, onto the block with brushes, but it was too soft -and while that can be pretty it was not the look I was going for.  So since I couldn't find my brayer, (I have one, just where it was? well you know how that goes) I used a sponge. 
Third is, find all your tools!  I don't mind the spongey quality of the inks but also not the look I am going for, so I went out and bought another brayer.  I plan on using the same block later in this week to try more color blending, so I will post the next grouping.  I also want the stamping elements (the little red flowers) to be more opaque.  I am using all water based inks and acrylics, so we will see how this works out. 

Wednesday, February 27, 2013

Printmaking and Textiles

If you have been following my ruminations here and on the Festive Fibers Facebook page, you will notice my newest interest in the medium of Printmaking.  Sure, as a textile designer and trained artist I have done some sort of printing over the years, lino-cut, silk screen, relief printing, stamping, etc. But as a textile designer I have never really focused my creative powers to this medium, which is funny because I have always loved the idea of silk screening my own fabrics, and I design patterns to be printed on fabrics.  But I never really played with that medium.  What was it that pushed my fabric design into feltmaking?  Well that's easy, my love of wool!  But as I have been thinking about my art and my personal history, I have begun to wonder about the printed surface again. 

A couple months ago I spent some time with my parents talking about a print they have and what they want to do with it, sell or donate?  I must say this very large print was a piece of art that hung in our house during my most artistically formative years.  Its bold graphic shapes and it bold colors repeated all the things of the colorful graphic art I was exposed to in the late sixties and seventies.  As I helped them find a value online,
we found the artist's website and then watched how Carol Summers actually printed this.  We watched this video on his site, fascinated by all the things (unconventional, in my mind) Summers did in achieving his print techniques.  From printing on front AND back, laying down heavy ink to get texture, rolling ink on the paper and blocks, spraying the inks with spirits to DYE the paper fibers and use his blocks like jigsaw puzzles, all struck me as something very interesting.  Sure I have watched wood block printing in the classical way, where many blocks were carved , then each printed with a different color in register onto paper.  My mother did this kind of printmaking.  I was never really interested in the slow carving process.  (remember - instant gratification me?)  So the thought of combining an array of surface techniques really speaks to me.  I have watched videos online of amazing artists doing traditional techniques so I may learn a bit of what I like an don't like about the processes.  Two amazing videos I found on YouTube are a video of Santa Cruz artist Bridget Henry
creating her prints.  15 carved blocks printed in registration...sounds to me like screens and traditional hand block fabric printing in textiles.  So I kept looking and found more beautiful techniques.  This one is a beautiful video of traditional Japanese Ukiyo-e block printing by master printer Keizaburo Matsuzaki. These techniques show me tonal work and the use of thickeners to hold soft water based paint on the surface of a block.
My own learning process is exciting to me.  I feel energized by my own creative process.  Equally exciting is what we can learn online - for free! There is so much more out there.  I have just returned from an art supply shopping trip, and am gearing up for a trial print run.  Stay tuned and I will post my experiments!


Tuesday, June 26, 2012

Newest Pillows Finished and Going on Etsy

These pillows are fun and quirky, I am calling them Wheels and Sprockets.  They have funky lavender pompom trim and are backed with a woven linen, edged in a teeny squared off decorative stitching.  They sit upon my famous Mary Chair!

Thursday, June 14, 2012

New Pillows from the Studio

If you haven't been following the fast and furious posts on the Festive Fibers Facebook Fanpage, I am putting up a small grouping of pillows onto my Etsy shop.  The three bottom pillows are currently in the shop and this funky lavender pair (shown half done) will soon follow.


Purchase pillows here!
Dark Teal RED FLOWER PILLOW
Dark Teal STARS PILLOW
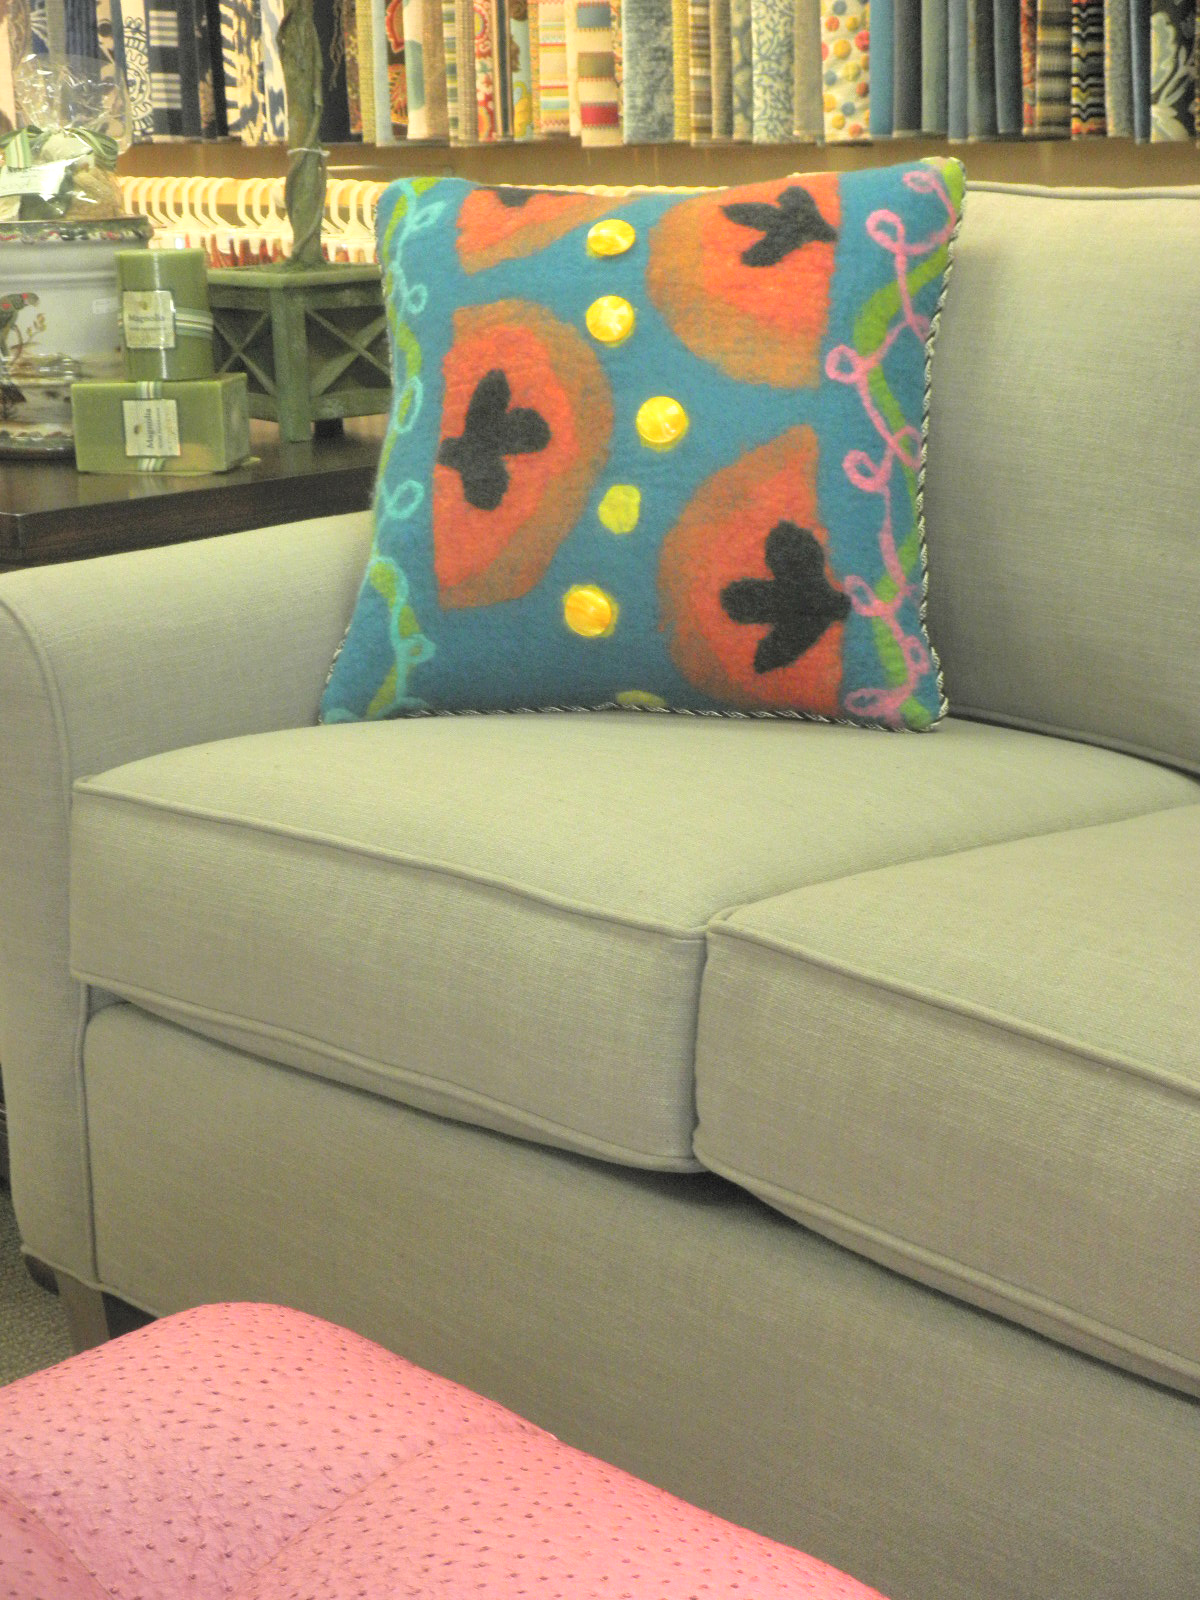
Turquoise pillow with YELLOW buttons
Don't want to make a purchase on line?  E-mail me!

Tuesday, June 12, 2012

A Glimspe into On-Line Learning

I know there are quite a few of you out there who have been pondering this on-line way of learning, we've spoken, but for those of you just in the I wondering phase, I am putting up this post to share a fantastic class and project, and show the progression of 4 weeks!  PLEASE NOTE the designs shown here are the property of Deb K.

Deb chose to do the Upholstery Fabric class, and with the goal to do an ottoman at the end of it.
So the first week we did two sessions in one, Color (1 Hour Session 1) and Design (1 Hour Session 2) These two sessions are desktop sharing and slide shows while I speak.  And then we discussed the goal, and what to expect for the next session.  Deb left that day, with a couple of assignments, one was Color Theory and the other to design her project so I could look at her piece and guide her.  Here's what she sent me over that week:
playing with the color wheel
Examples of some of the Theory Color Schemes (one example of many pages of exercises she tried)
Inspiration for those designs


 The next class was a demo of laying out and a speedy wet felting demo for the making of the gauge, discussion of gauge, shrinkage and thickness, etc.  The next Monday morning I came to my computer to see the following photos of the sample.  Now this was not just a sample but would also turn into something...
 
The next 6 days I received more photos of the 5 total panels needed for Deb's Ottoman.


 These five panels show her pieces laid out and dry before felting.  I made suggestions about compressing and needling, Deb used a 5 needle punch and compressed by hand.  She needled all the detail by hand. we discussed the opacity of the fibers and areas of color, how the detail might look as it felts, did she want it to crinkle or stay straight?  these are all points for a felter to be away of how her felt will felt, and shrink and what might happen to the design and details in that process, decisions are made accordingly.
I made a mini wetting and rolling demo, before she began all five pieces to make sure she was comfortable with technique, etc.


 We analyzed, I looked at close-ups to see how hard the pieces were felted, especially the detail and line-work, we met again to show and tell how to cut sew and upholster Deb's ottoman.  (There were actually two she wanted to do, the first and smaller one, had to be made from her Gauge piece, because as she said she never does something that can't be turned into something she will love, I agree! 

We discussed tools, supplies, the best techniques to sew and turn in felt, as well as recognizing what felt will do as well as someone's upholstering tools and type of sewing machine, stapler, etc, so one can be prepared to make style calls like how to attach trims and other embellishments.  I use all low tech tools in the studio - no air compressor for staplers, or heavy upholstery sewing machines, we work with what we have!
the finished product is stunning, thank you Deb for letting me share your experience with others!
(The mini ottoman is her guage!  See why guages are so important?)


PS Her ottoman was one she bought at one of the big chain stores, the mini was a little one inside the bigger one!  They were covered in vinyl, and she simple upholstered OVER the vinyl.  Easy peasy!  She also just began using a new I-pad for the on-line class as well as using it to take her photos for me to see.  We used Skype for all 4 sessions.

I hope these photos show how easy and supportive on-line teaching can be, and you too will join the fun!
-Nicole

Thursday, April 19, 2012

Spring already landed in SOWE NH?

Well, I cannot believe it is two months since my last post.  Yes, I guess I can, I have been going going going!
We took a vacation to San Diego and Los Angeles the end of February, and after we returned, the weather here in So Western New Hampshire has been threatening SPRING in full force!  We had over a week of over 80 degrees in March, and now it is the middle of April and I have rushed to turn my veggie bed, and put down grass fertilizer before it rains this weekend.  Folks here are already mowing grass!  I think I'll be mowing mine next week.

I am scheduled to give an hour presentation, titled "A Matter of Color" Friday May 4th to the New Hampshire Assoc. of Family and Consumer Sciences, that's NHAFCS for short.  I will be presenting at the new Marriott in Keene, NH.  It is my Color Theory Class put to slide show, in BRIEF.  I think it will work out very well, I spent quite a few hours converting my favorite magazine photos into jpegs and translating the progression of my full day class into a one hour slide show.  I am presenting to educators, this is a break out session for them to get CEs.  I'll let you know how it goes!

Also recently I taught a 4 day class at NEFS. (That's New England Felting Supply in Easthampton, Mass) We had a full class at 12 students!  The class was Felts for Upholstery Fabric, and while these shots of the final day and critique are great I cannot wait to see some of the finished chairs and pillows students promised to make their fabrics into!!
Last but certainly not least I am beginning to paint designs again.  I have cleared studio space, made the paper (Stonehenge from Utrecht Art Supplies, I love the guys in the Cambridge Mass store, they are sooo helpful) and paint purchases (Turner Design Gouache from Jerry's Artarama, thanks for turning me on to Jerry's both Gail Callahan and Jean Gauger - I did this order via internet, but yes ladies one day we should go to the "local" store in person!  But boy you should have seen all the FREE goodies I got along with my paints!  I thought I got someone else's order!), and am starting to get pumped!  Presently a gorgeous turquoise mottled blotch sits on my painting table...much more to come on this!   Can you guess what color those flowers are going to be?